Mytaste.ph

Lunes, Abril 23, 2012

Lazy Tuesday: The Ultimate Seafood Kimchi Melt Sandwich


Travelling from Narnia to the Metro and vice-versa twice a week can be really tiring and sometimes it just takes a toll on my body. Come Monday or Tuesday when I'm back in here from the long travel, I feel lethargic and too lazy to do anything. And when I can't wake up early to cook a decent meal to serve my husband, I whip up a handy and hearty sandwich in a flash so he can take it with him and eat while he's on his way to the clinic. Oh yeah, that's me, the good wife, nyahahahaha. I can't afford him to not have his most important meal of the day: breakfast. 

And since I usually haven't done any market shopping yet at this time, I just rely what's in the pantry and in the fridge. Today, I found some leftover crab flavored seafood sticks that I usually use for maki and kimbaps, some canned tuna that's been sitting in our pantry for quite sometime, and homemade kimchi! I have been making my own easy Kimchi since the great Maangchi personally taught me how to do it when she visited us here for her Gapshida Tour. It's nothing like those crappy kimchis in tetra packs that you find in the grocery, which are usually reeking of preservatives and MSGs! Here's her easy, healthy, super tasty recipe for Easy Kimchi.

Okay, this may not yet be THE ULTIMATE Seafood Kimchi Melt Sandwich but let the word "Ultimate" make up for all my short-doings this morning and lure you to this little thing that's so jam packed with foodie goodness. Convinced yet? =) Let's go make one! 

What you'll need: (makes 2 sandwiches)

- 1 can tuna; about 180 grams
- 2-3 tsp of Liquid Seasoning (e.g. Knorr Liq. Seasoning; Maggi Savor)
*if you don't have any liquid seasoning, use light soy sauce
- 1 tsp white sugar
- drizzles of sesame oil
- toasted sesame seeds
- 2 pcs of crab flavored seafood sticks
- 1 tbsp Kimchi juice (yes, its that liquid in the kimchi)
- 2 tbsp Japanese mayonnaise
- some Kimchi
- 4 slices of your choice of bread (I used wheat bread slices)
- some Romaine lettuce leaves
- some onion rings
- slice of cheddar cheese

"crab flavored seafood sticks"

Directions:

1) First, drain the tuna from the can very well. Squeeze out all liquid using your kitchen paper towels. 


2) Heat some non stick pan and drizzle with some sesame oil. Stir fry the tuna flakes and season with 3 tsp of liquid seasoning and 1 tsp of sugar. Stir fry over high heat for a minute and add toasted sesame seeds. Remove from heat and drizzle with some sesame oil. Set aside.


3) In a small bowl, combine 2 tbsp of Japanese Mayonnaise and 1 tbsp of Kimchi Juice. Mix well.


4) Shred the crab stick into small pieces and mix in the Kimchi-Mayo. Stir well to combine.


5) Let's begin the sandwich assembly! Put on a plate your choice slice of bread and layer it first with the crab stick seasoned with the Kimchi-Mayo.


6) Top it with a Romaine Lettuce leaf.


7) Top that with the seasoned tuna flakes.


8) Fourth layer will be some onion rings.


9) Fifth layer is the mouth watering Kimchi!
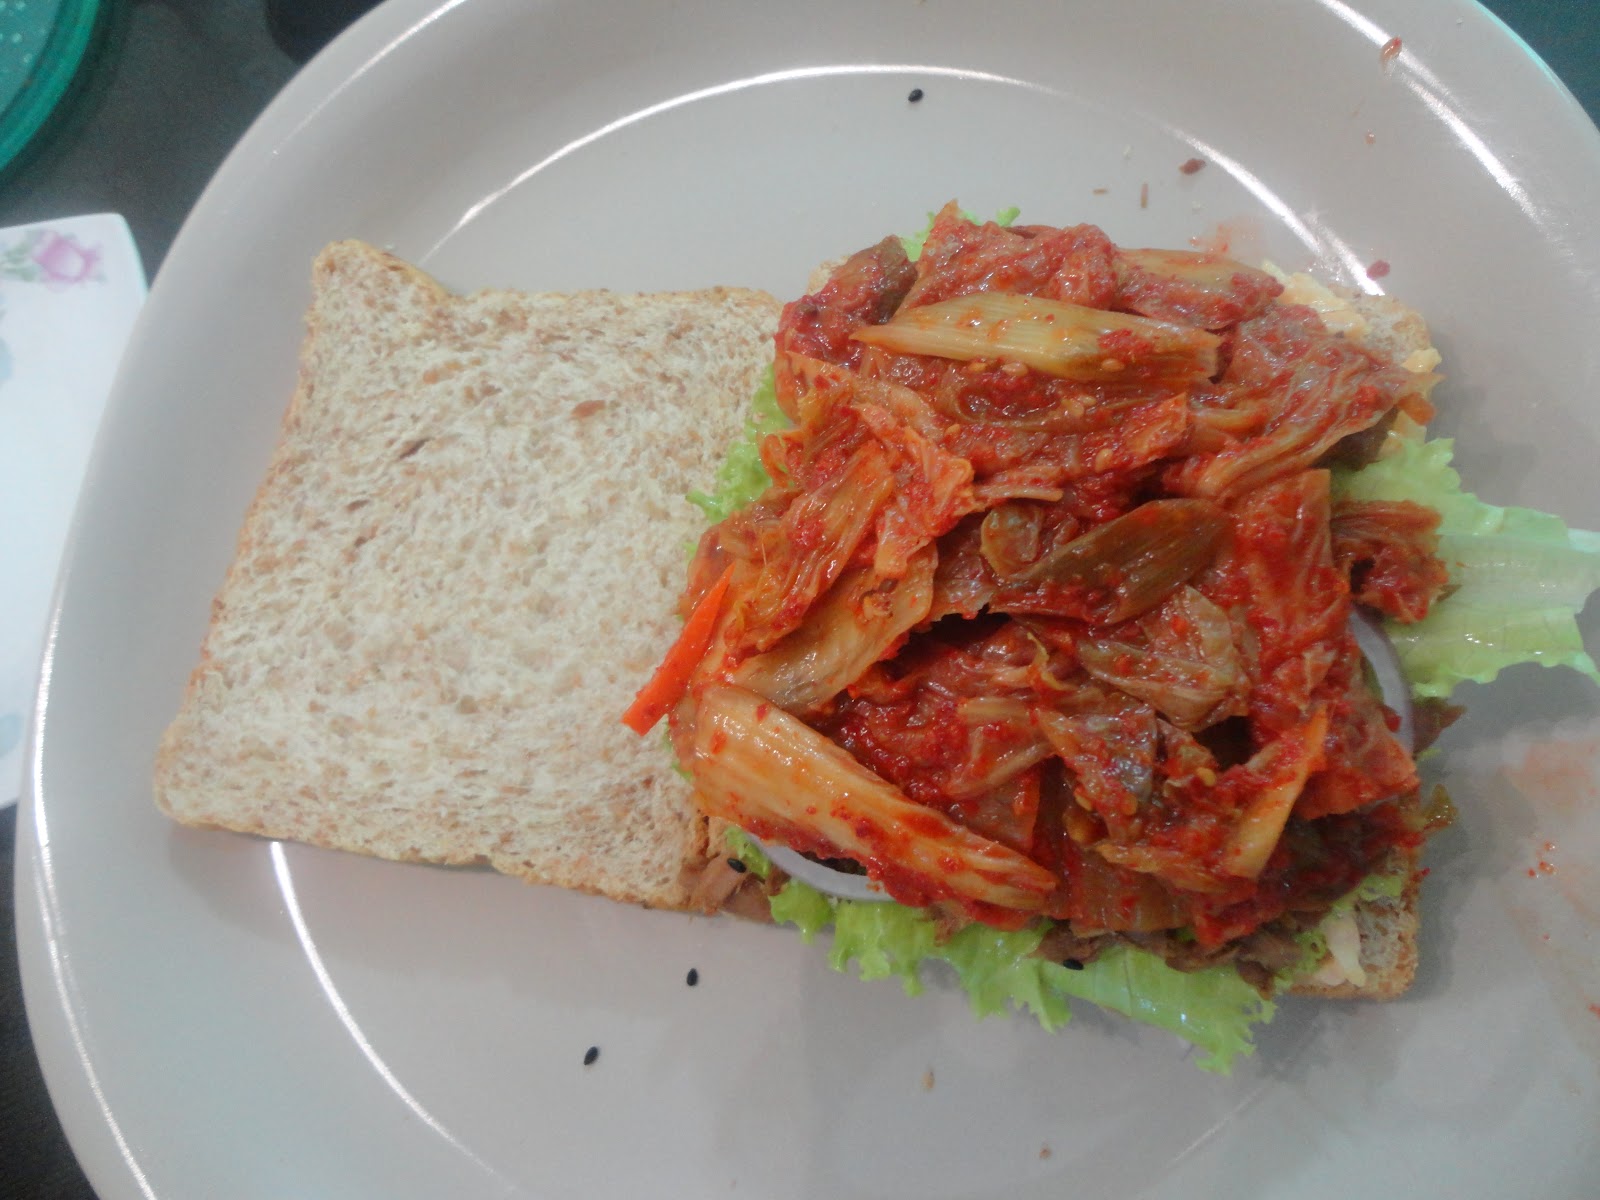

10) Lastly, some good old sliced American Cheddar Cheese.


11) Heat the same pan you used for your tuna, and just heat the sandwich on both sides for a minute or so until the cheese melts.


12) Sliced into 2 before serving. I garnished and served mine with some sweet rice crisps to balance this spicy, savory sandwich.

 "Lookie lookie! Just look at that melted cheese that sticks to the delicious Kimchi!"


Kimchi has become one of my kitchen staples and it is as versatile as the pasta. There are about a million things you can come up with using kimchi and this deli-sandwich is just the first one in this blog list. Expect me to come up with more unique dishes that incorporates this Korean side dish! =)


I am pretty sure that this sandwich can make up for my lazy morning. I may have ran out early of Kitchen prowess  to run my kitchen; but a little creativity here and there using available ingredients in your pantry and fridge can still get you a loooong, loooong way! =) That's just the magic with food, it's like love match matching, you'll never know who goes well with who until you pair them! =) Haha, good luck with food match making! =)

Happy Eating! =)

Sabado, Abril 21, 2012

1st Vietnam dish post: GOI CUON (Fresh spring rolls) with 2 Special Sauce


I love the fresh flavors of Vietnam!!! But a little disclaimer first: I have NEVER been to Vietnam (another one for the bucket list!), and the closest to authentic Vietnamese food I have devoured was taken care of Pho Hoa and Pho Bac, which I both love none the less.

Pho Hoa in particular holds a special place in my heart, since this was where my husband and I dined after his so called "wedding proposal". Well anyway, fast forward to several years after since that momentous event, I am still in love with him and with Vietnamese cuisine! tee-hee! =)

"Pho Hoa's Goi Cuon"

For my first Vietnamese dish post, I have decided to feature their famous appetizer: GOI CUON (Vietnamese Fresh Spring Rolls) to entice your appetite for more to come! =) Plus, they are the perfect appetizer this summer, refreshingly cool and yummy! =)

Here's my first ever made Goi Cuon:

"Love at first bite!"

Not bad at all! But several versions after, here's a more polished recipe with not one, but two sauces to go perfectly with the Goi Cuon: (recipe adapted from Allrecipes.com and Good Housekeeping)

Ingredients: 

For GOI CUON (makes 6 pcs.)

- 2 small packages of Vermicelli noodles; less than 2 ounces
- 6 pcs. rice paper


- Your choice of fresh green leafy vegetables: 
*I got myself some fresh basil leaves and mint leaves from the pots in my garden! It pays to grow your own herbs! The fresher the herbs, the better the rolls will be. =)


- a handful of basil
- a handful of cilantro (my favorite herb!)
- some mint leaves
- a handful of chopped Romaine Lettuce leaves 
*wash all the leaves thoroughly
tip: you can use cucumber too!
- small carrot, grated 
- 9 pcs of shrimp


Directions:

1) Boil a pot of water and cook the shrimps until orange, this will take just a few minutes, about 3 minutes.


2) Once shrimps are done, remove them from the pot but do not throw the water and do not remove the pot from heat. While water is still boiling, soak the vermicelli noodles until they are soft about 3 minutes. Remove pot from heat and soak the vermicelli for another 3 minutes. 


3) Drain and cut into shorter pieces. 


3) Peel, and cut in half the cooked shrimps.


 4) Prepare all ingredients for assembly and have a plate with 2 small kitchen towels dampened in lukewarm water ready. Place one of the dampened towels in a large plate and place one rice paper over it. Cover with the remaining towel to soften for 10-15 seconds.


5) Transfer the rice paper to your "assembly" plate, they should be not too wet and be pliable without tearing. Place a handful of vermicelli first.


5) Top with a handful of your vegetables of choice. 


6) Roll it to the center, sides still uncovered and follow it with a layer of 3 pcs shrimp, its orange side should be the one touching the wrapper. Then fold in the sides of the rice paper inward, then continue to roll the paper. 


*You're right! I ran out of 1 shrimp! that's why 2 rolls only have 2 shrimp halves! haha

Let's proceed with making the 1st sauce: I am more partial to this by the way. =)

FISH SAUCE-LIME JUICE DIP
(recipe from Allrecipes.com)

In a bowl, combine the ff.:

- 4 tsp fish sauce (It's my recommendation to use Thai fish sauce; it has a cleaner taste than our local ones, IMO)
- 1/4 cup water
- 1 clove of garlic, minced
- 2 tbsp of white sugar
- 2 tbsp lime juice (No lime so I used our Local Calamansi a.k.a Philippine Lime), you can use Lemon too! 
- 1/2 tsp of Chili Garlic sauce


Just mix everything until well combined.

The next sauce, I am not sure if is still "Vietnam" in origin, for it is very similar to "Thailand's" peanut sauce. 

PEANUT-COCONUT DIP
(recipe adapted from Allrecipes.com)

Make sure to make this ahead of time to appreciate its flavors. When eaten right away, it can taste like any peanut butter.

In a microwaveable bowl combine:

- 1/3 cup of creamy peanut butter
- 1 1/2 tbsp of water
- 1 1/2 tbsp of calamansi/ lime juice
- 1 1/2 tbsp of soy sauce
- 1/2 tbsp of minced ginger root
- 1/2 tbsp of Thai fish sauce
- 1-2 cloves of garlic, minced


Mix everything well and microwave on medium heat for 20-30 seconds just to heat it through. Stir in 1/4 cup of coconut milk and stir to dissolve thoroughly. Let this sit for a while for a minimum of 30 minutes before serving.


Mix in about 2 tbsp of fresh cilantro before serving.


DONE! =)

Serve the fresh spring rolls with the 2 sauces and dip it in your choice of sauce. =)


Come to think of it, it wasn't much of a work, if you just get through the fresh spring roll assembly then everything is just a breeze! =) Just mixing everything well. =) 

The mint, cilantro and basil in the rolls with the shrimp and the dips are all an explosion of wonderful flavors in each bite!!! GO-MAKE-ONE-NOW! This is definitely the perfect appetizer this summer! Oh wait, haven't I mentioned that already! Oh well, this will definitely make you ridiculously redundant, that's how good this is! ;-)

You can also get creative with this and add other protein, like seasoned minced pork or shredded chicken. Or some mushrooms perhaps! The choice is yours! =)

Another tip: If you can't find any rice paper wrapper, no problemo! In your salad plate, combine some vermicelli, your choice of veggies and fruits (mangoes, papayas, pineapples, etc.) and drizzle with the fish sauce-lime juice dip. Voila! Another healthy salad to include in your salad creations! =)


Next Vietnamese dish post must be the PHOS, if only I can get through this summer heat first! I am soooo hot! Errrrr, I mean I feel so freaking hot because of the freaking hot weather! So let's beat it first with all the refreshing food and drinks as much as we can to avoid heat stroke! =)

Happy Eating! =)

Huwebes, Abril 19, 2012

BAKED Seasoned TILAPIA with MANGO SALSA


Mangoes are generally abundant all throughout the year in the Philippines; BUT I believe that they are the SWEETEST during the Summer season; probably because this is their natural harvesting time. Last night, we had another healthy dish that utilized this season's freshest ingredients. Another healthy, easy and tasty recipe to try for you and your family.

Let's begin by making the salsa. The mango salsa should be prepared ahead of time; it needs at least about an hour or so for all the ingredients to beautifully blend together. If I'm not mistaken, I've read this mango salsa recipe from Allrecipes.com (again!) several months ago. This is my 3rd time making them, and every time is different, like if I have other fruits around, like strawberries, avocado, pineapple or papaya; I'll throw it in the salsa. It adds a different flavor each time. For the meantime, here is the basic recipe for the mango salsa.

Ingredients and how to do it: (for 2 servings) 

MANGO SALSA


- 1 ripe mango, diced
- 1 red bell pepper, diced
- 1 green bell pepper, diced
- 1-2 green finger chilies, diced 
- handful of cilantro
- 1 red onion
- juice of 1/2 lemon
- juice of 1/2 orange
- a drop or two of hot sauce
- salt and pepper to taste

1) In a bowl, combine first all the hard veggies: the bell peppers, onion and chilies. Lastly add the diced mango and the cilantro. Season with salt and pepper.


tip: You can remove the seeds of the green finger chilies prior to dicing them if you want to lessen the heat.

2) Add in the juice of the the lemon and the orange.


3) For more zing, add a drop or two of hot sauce and mix everything well. Set aside and let rest for at least an hour before serving. DONE! =)


BAKED SEASONED TILAPIA

Let's move on with our protein: Tilapia. 
(I used about 2 medium Tilapia about 200-250 grams each.)

1) Place aluminum foil in a shallow baking tray; making sure there are excess of the foil to cover your Tilapias and make a pocket; and drizzle with olive oil.


2) Place your tilapias and generously season them with Sea Salt and freshly ground black pepper on both sides. Add another flavor profile by adding in some of your favorite dried herbs. I added these tilapias with generous dashes of dried basil leaves.


3) Thinly slice the remaining half of your lemon (the same one you used for the mango salsa) and place them on the tilapias. Drizzle with more olive oil before sealing the foil.


4) Cover the tilapias with aluminum foil making sure all sides are sealed. Marinate them inside the foil for at least 30 minutes prior to baking. Preheat your oven to 180 C.


5) Bake for 20-25 minutes. The tilapias in the foil are now baking in their own wonderful juices. Remove from oven and serve with some Mango Salsa on the side. Enjoy with hot rice. =)


tip: If you don't have an oven, you can grill this instead.


Each bite transports you to Island paradise! Close your eyes and you might hear waves crashing in. =)

Happy Eating! =)