
I have said in my recent post that I will include a “Katsu”
dish for my menu this week, and that came earlier than I expected, since I remembered
that husband and I just did some grocery shopping and bought some chicken
breast fillet the other night. I don’t like stocking any fresh meat in my freezer; I try
to cook them as quickly as I can to ensure they are still of good quality and
as much as possible just buy them when the need arises. It’s also great timing that I still have all
the ingredients for making some chicken “schnitzel” since it’s the same
ingredients I used for the Longganisa Scotch Eggs.
There are a loooooot of things and techniques that you can
apply with chicken breast fillet: roll and fill them to make cordon bleu,
season them into fajitas, grill and toss them into your salads, etc. It’s flexible and healthy.
I miss making Chicken breast fillet dishes, I realized it’s been quite a long time since I made one, probably because I had been busy creating vegetable and fish dishes for the recent holy week. Now, it’s back to regular programming, welcome back, Pork, Beef and Chicken! Lol. =)
Tonight’s dinner dish has 3 components: the Chicken Katsu,
Katsu Sauce and a side salad of Apple-Cabbage Slaw. You can make both the sauce
and the slaw ahead of time, as both gets better in time and the flavours blends
so well together after a while.
Basically, a Katsu sauce is just some ketchup combined with
Worcesterchire sauce and seasoned with some sugar and pepper. But I have found
a good basic Katsu recipe by username: Soifua via Allrecipes.com. Thanks Soifua! =) Let’s start
making the KATSU SAUCE.
Here’s her Katsu sauce recipe with some modifications: (good for 4 servings)
In a small bowl, combine the following:
- 1/2 cup ketchup
- 2 tsp dry mustard powder
- 1 tsp garlic powder
- 1 tsp ground black pepper
- 3 tbsp Worcesterchire sauce
Just combine everything in the bowl and refrigerate for at least an hour for the flavors to blend well. BUT, what I did was, put everything in a saucepan and simmered over low heat just until all the spices are dissolved.

While making the sauce, I tasted it and felt like I still
needed to tweak it to suit my husband and I’s taste. And if you’ve been reading
my blog, you probably have observed how much I love putting and playing with different
spices. So to this concoction, I added:
- 1 tbsp of white sugar
- a dash of turmeric (for color)
- a dash of cayenne pepper (for a little heat)
- 1 tbsp of Kikoman Soy Sauce (it's "Japanese")
- 1 tbsp red wine vinegar (for a little more sourness)
- 1 tbsp of Mirin (again, to make this more "Japanese")

Just let it simmer until all spices are well dissolved. Remove from heat. Set aside.
Now, for the APPLE-CABBAGE SLAW:
This is my no-frill recipe for creating a light, yummy side
dish perfect with the Chicken Katsu. The salad dressing is so easy to make with
only 5 ingredients to use, I got this from my dear Mother.
1) In a large salad bowl, combine 1/2 of whole cabbage head, shredded; about 2-3 cups; 1 sliced fuji apple, 1 diced red onion, and 1/2 of a medium carrot, grated. Stir everything well and add juice of half a lemon. Stir well.

2) Follow it with 1/2 cup of Japanese Mayonnaise. Mix them well.

3) Then, 1/4 cup of Condensed Milk. (Yup, you read that right! Condensed Milk! =))

4) Finally, season with salt and pepper. Mix everything well. Set aside in the fridge.


Lastly, let’s make the CHICKEN KATSU. (You can also do this with pork and large shrimp.)
(Makes 3 pcs. Chicken Katsu)
1) With the back of your knife, pound the chicken breast fillet to flatten it. Then, pat them dry with a kitchen towel or paper to remove excess moisture. Season both sides with salt and pepper.


2) Prepare all ingredients for your "Breading Station":
- 1 beaten egg in a bowl
- 1 cup Japanese bread crumbs (Panko) in a plate
- 1/4 cup of flour in a plate

3) Dredge the Chicken fillets in the flour, remove excess.


4) Dip it in the beaten egg.


5) Finally, press them in the Japanese bread crumbs and coat very well.

6) Chill the prepared "Katsu" in the fridge for at least 15 minutes before deep frying.

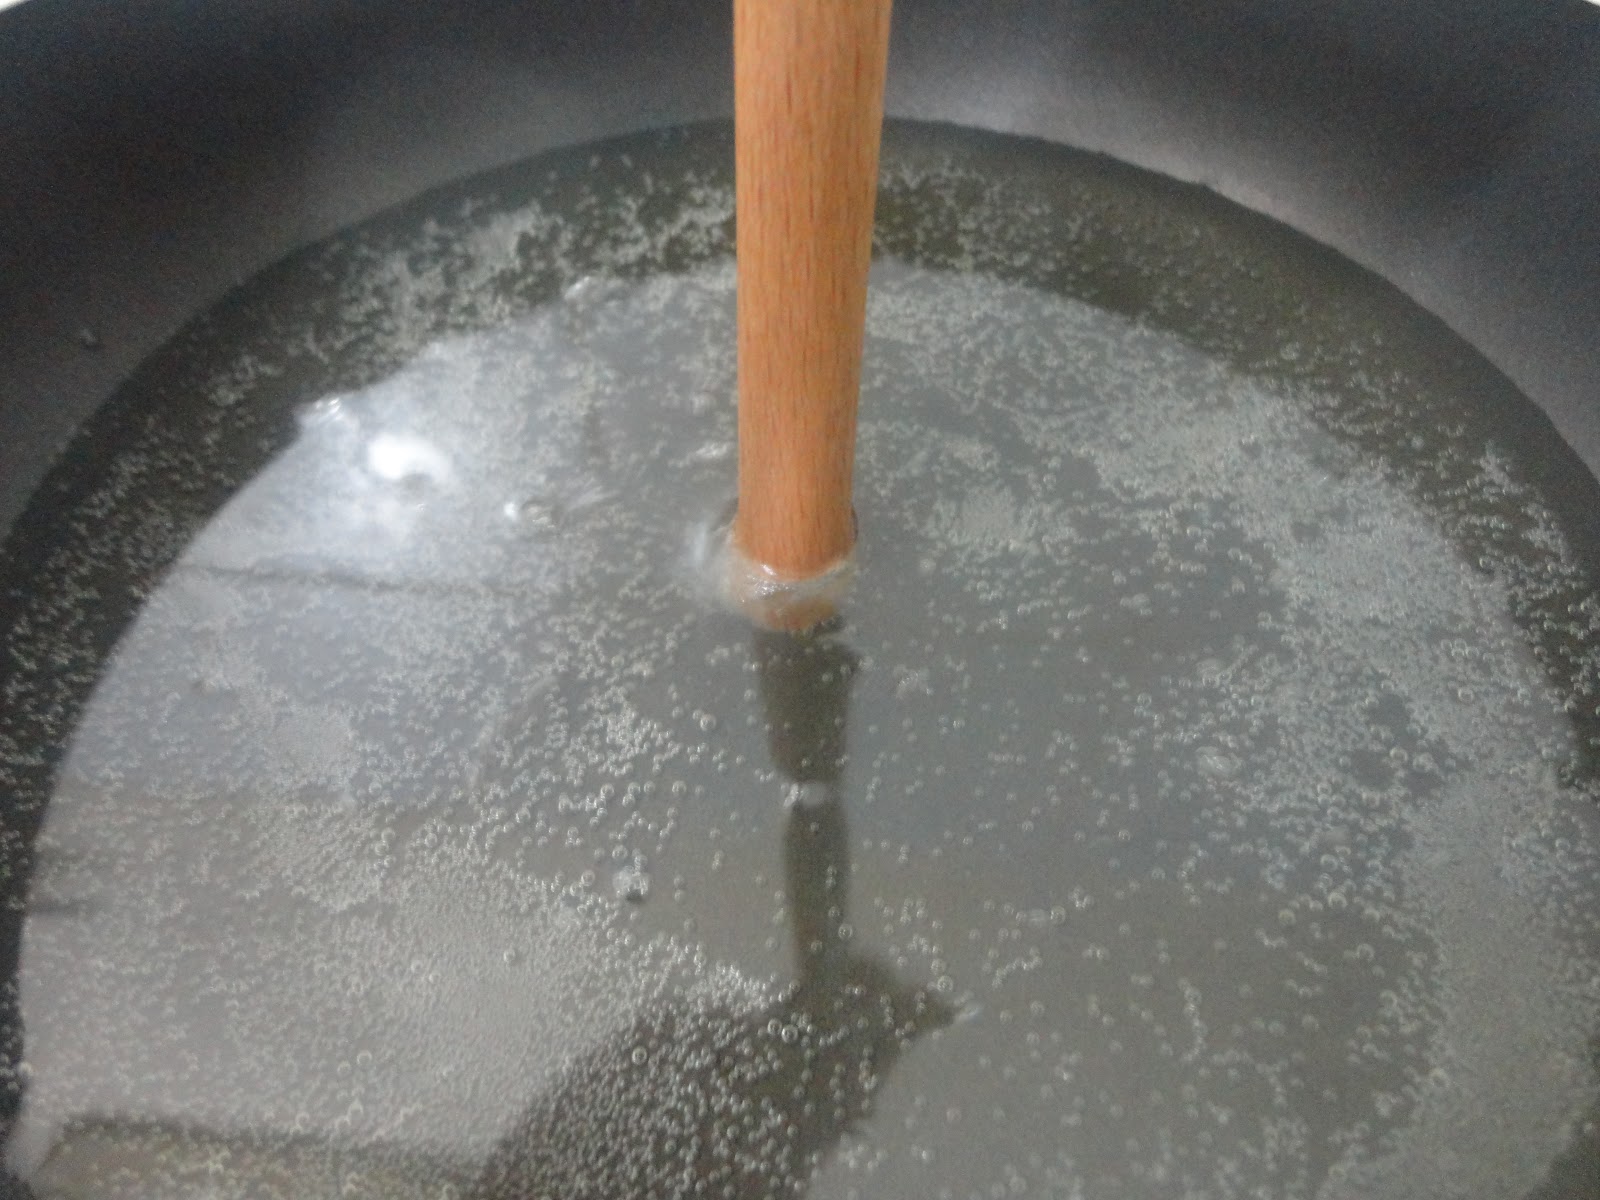
7) When ready to fry, heat some pan with a cup of vegetable oil.

tip: You'll know your oil is at the right temperature for deep frying, if, when you put the handle of a wooden spoon, it bubbles around it. I think, I got this tip from watching Nigella. =)
8) Place the breaded chicken in the pan at least 3-4 minutes on each side or until it is beautifully golden brown.

9) Drain to remove excess oil.

10) Let them cool a bit before cutting into serving pieces. Transfer to a serving plate with the Katsu Sauce on the side or drizzle it on top of them.


11) Serve with the Apple-Cabbage Slaw. Enjoy it too with some hot rice.


These have become a favorite in our household; the Chicken Katsu is crispy and tender; and the sauce and the Slaw just really gets better in time. It is a balanced meal on its own. Try these at your homes too and tell me if its a keeper in your recipe files. =)
I hope each and everyone of you had a great Easter holiday. =)
Happy Eating! =)


